
Last updated November 18, 2026








Free written scope consultation - allowances, timeline, and change-order rules on paper before a single trade is scheduled
Kitchen Remodeling Maintenance Schedule: What to Do and When
Quartz countertops are marketed as maintenance-free, and they nearly are. But the caulk seam where the counter meets the backsplash is not. When that joint opens and water wicks behind the tile for eighteen months, the repair bill is a fraction of your original countertop cost but still a painful surprise. Most remodeled kitchens don’t fail because the materials were cheap. They fail because nobody told the homeowner which small tasks protect the expensive stuff, or when to do them. In this guide, we’ll lay out a month-by-month maintenance calendar for the first year after a kitchen remodel in Frisco, explain the specific care needs of each finish you might have chosen, and show you where homeowner maintenance ends and your contractor’s guarantee begins.
Quick Answer
A newly remodeled kitchen needs a structured maintenance schedule for its first twelve months: check and tighten cabinet hardware and hinges at month one, three, six, and twelve; inspect and refresh caulk at backsplash seams and sink edges by month six; test appliance connections for slow leaks at months three and nine; and reseal natural stone or grout annually. The tasks you skip in year one are the ones that turn into subfloor damage, cabinet drift, and mold behind tile by year three.
Styles & brands we work with
- Kitchen remodeling
- Bathroom remodeling
- Home additions & ADU
- Roofing
- Windows & doors
- Driveway & pavers
- Fence
Table of Contents
- Why a New Kitchen Needs Maintenance Earlier Than You’d Think
- Month 1: The Settling-In Check
- Months 2 – 6: Caulk, Seams, and Hardware Drift
- Months 7 – 12: Appliance Connections and Seasonal Checks
- Finish-by-Finish Care: Cabinets, Counters, and Grout
- Cabinet Hardware and Hinge Adjustment
- What Your Contractor’s Guarantee Covers (and What It Doesn’t)
- Year Two and Beyond: The Annual Routine
Why a New Kitchen Needs Maintenance Earlier Than You’d Think
A brand-new kitchen is still settling. Wood cabinet boxes and doors absorb and release moisture for the first year, which means doors that hung perfectly on install day will drift a few millimeters by spring. Caulk that was fresh and flexible in January will shrink and pull away from the backsplash by the first dry North Texas summer. Grout lines cure, shift, and sometimes crack at inside corners. None of this means the work was bad. It means the house is alive, and Frisco homes see a specific set of stresses that accelerate the process.
Frisco’s climate swings hard. Summer humidity pushes cabinet doors to swell, and winter dry spells pull them back. That expansion and contraction cycle is what loosens hinges, opens caulk joints, and makes drawer fronts go slightly out of alignment. Homes on slab foundations also experience normal seasonal movement that shows up first at tile transitions and counter seams.
If you spent $18,000 – $55,000 on a kitchen remodel – the typical range here depending on layout, cabinet line, and countertop material – the difference between a kitchen that still looks new in year ten and one that needs repairs in year three is roughly two hours of checks per year.
What You’ll Be Checking
- Caulk joints: backsplash seams, sink rim, countertop-to-wall transitions
- Cabinet hardware and hinges: pulls, knobs, European-style concealed hinges
- Appliance connections: dishwasher supply line, gas fittings, refrigerator water line
- Grout and tile: hairline cracks, missing grout at corners and transitions
- Drawer slides and soft-close mechanisms: alignment and lubrication
Month 1: The Settling-In Check
One month after the crew leaves is when the first real adjustments surface. The kitchen has been used, the cabinets have opened and closed a few hundred times, and materials have absorbed their first round of household humidity. This is the most important single maintenance visit of the entire first year, and it takes about forty-five minutes.
- Open and close every drawer and door slowly. Listen for rubbing, squeaks, or soft-close dampers that don’t catch. Note anything that feels loose or misaligned.
- Check each cabinet pull and knob. Run a screwdriver over every one. Wood screws in new cabinet faces can seat a fraction deeper after the first month of use. A loose pull will eventually wallow out the hole, which is a much bigger fix than a quarter turn today.
- Inspect caulk at the sink rim and backsplash. Look for any spot where the bead has pulled away from the wall or the counter. Press gently with a dry finger to feel for gaps.
- Look under the sink. Run a tissue around the dishwasher supply line connection, the drain fitting, and the disposal mount. A slow weep shows up as a damp ring on the tissue before it ever shows up on the cabinet bottom.
- Check the refrigerator water line. If you have a fridge with a water dispenser or ice maker, look at the connection at the wall valve and behind the unit. Feel for dampness.
- Test every GFCI outlet in the kitchen by pressing the test button, then reset it. This is quick and catches a faulty receptacle before it becomes a nuisance.
- Note any grout cracks at inside corners or where tile meets counter. Hairline cracks at changes of plane are normal and get caulk, not grout, on the fix.
Write it all down. That list is your baseline. When something looks off in month eight, comparing against your month-one notes tells you whether it’s new or whether it was always that way.
Months 2 – 6: Caulk, Seams, and Hardware Drift
By the third month, most Frisco kitchens start showing the first real maintenance needs. This is the window when caulk joints open, hinges drift, and the small stuff begins to compound if ignored.
Month 3: The Connection Check
Repeat the under-sink tissue test and the refrigerator water line inspection. This is also the right time to pull out the dishwasher and look at the supply line and drain hose where they meet the unit. Slow leaks at these connections are one of the most common causes of subfloor damage in remodeled kitchens, and they’re invisible until the floor starts to cup. Check the gas line fitting at your range – not to tighten it yourself, but to look for any corrosion or smell. If you smell gas, leave the house and call your utility immediately. Gas fittings are not a homeowner task.
Months 4 – 5: Caulk Refresh
Inspect the caulk at the sink rim, backsplash, and counter-to-wall seams. If the bead has pulled away or looks chalky and cracked, it needs to be removed and replaced. Use a 100% silicone caulk in wet areas like the sink rim, and a paintable latex-silicone blend at painted wall seams. Scrape out the old bead with a plastic scraper, clean with rubbing alcohol, let it dry completely, and lay a fresh bead. This is easy homeowner work – and it’s the single highest-value task on the schedule, because a failed sink caulk joint lets water straight into the cabinet base. A product like Schluter’s sealing tape at the tile-to-counter junction, if your installer used it, gives extra insurance against wicking behind the backsplash.
Month 6: The Half-Year Hardware Pass
Do the full hardware check again: every pull, every knob, every hinge. Freshen soft-close drawer slides with a dry silicone spray (never oil, which attracts dust). Look at drawer fronts – if they’re no longer flush, the hinge or the slide needs adjustment, not replacement. A kitchen that’s been used six months is also the right time for a real inspection of the under-sink area and the dishwasher connections, because any manufacturing defect in a supply line almost always reveals itself by now.
Months 7 – 12: Appliance Connections and Seasonal Checks
The second half of the first year is when the connection checks become the priority and the seasonal climate effects start to show. Frisco’s dry fall gives you the best window to check caulk and grout before winter, and the cool months make the under-sink work less miserable.
Month 9: The Deep Connection Inspection
- Turn off the water supply to the dishwasher and the refrigerator, then check both connections with a dry tissue. Look for mineral crust or a damp ring at the fitting.
- Inspect the dishwasher drain hose where it loops under the sink. Make sure it still has its high loop or air gap. A hose that has slipped down will siphon dirty water back into the dishwasher.
- Check the range’s gas fitting for corrosion or a soap-bubble test at the connection. If you’re not comfortable with this, don’t do it. Call a licensed professional.
- Look at the refrigerator water filter housing for cracks or dampness. Replace the filter on the manufacturer’s schedule – a stuck filter puts pressure on the line.
- Check the dishwasher’s door seal and the bottom of the unit for any water staining.
Month 12: The Anniversary Reset
One year in, do the full hardware pass, the full caulk inspection, and the full appliance connection check. This is also when natural stone countertops need their first annual reseal, grout in high-traffic zones may need touch-up, and you’ll have a year of notes to compare against your month-one baseline. Year one is the hardest on a new kitchen. After this, the schedule gets simpler.
If you’re planning other projects alongside the kitchen, our bathroom remodeling in Frisco team runs the same first-year maintenance schedule for vanities, tile showers, and fixture connections.
Finish-by-Finish Care: Cabinets, Counters, and Grout
Not every kitchen has the same maintenance needs. The material you chose determines which rules apply. Here’s the breakdown for the most common finishes we install in Frisco homes.
Painted Cabinets vs. Stained Wood
Painted cabinet doors, like the ones from KraftMaid and Wellborn that we install, are durable but not indestructible. Wipe spills promptly with a damp cloth and mild dish soap. Avoid abrasive cleaners and scrubbing pads, which dull the finish. Check painted door edges and corners for chips at the twelve-month mark – a small chip is easy to touch up, but left alone it lets moisture into the wood core. Stained wood cabinets need the opposite care: they’re more tolerant of moisture but more sensitive to sunlight and heat, so avoid placing the coffee maker or toaster directly under a cabinet where steam and radiant heat can dull the finish over time.
Quartz, Granite, and Tile Countertops
Quartz, like Cambria, Silestone, and Caesarstone, doesn’t need sealing and resists stains well, but it doesn’t like heat. Always use a trivet or landing pad under hot pans – thermal shock can crack quartz. Granite needs an annual reseal and benefits from a pH-neutral cleaner, never vinegar or citrus, which etch the surface over time. Tile countertops need their grout sealed annually and their caulk joints checked twice a year, because grout lines are the first place water gets in.
Grout vs. Large-Format Slabs
If your backsplash or floor is small-tile with grout lines, that grout needs resealing once a year and a touch-up wherever it cracks at inside corners. Large-format slabs, like a single slab backsplash, eliminate the grout problem entirely – but the caulk joint at the counter and at the cabinet edge still needs the same inspection. The joint is the weak point whether the material is tile or slab. For fixtures, Moen and Delta faucets are built to be serviced rather than replaced; a slow drip is usually a cartridge, and that’s a fifteen-minute fix rather than a new faucet.
Cabinet Hardware and Hinge Adjustment
Cabinet doors drift over the first year, and in most cases it’s not a defect. It’s the hinge doing exactly what it was designed to do. European-style concealed hinges have three adjustment screws, and a three-minute adjustment fixes almost every alignment issue. Here’s how to tell whether drift is a hinge problem or a cabinet box problem.
- Look at the gap between the door and the cabinet face. If the gap is uneven top to bottom, the hinge needs a vertical adjustment. If the door is too far forward or too far back, it’s a depth adjustment. If the door is shifted left or right, it’s a side adjustment.
- Turn the adjustment screws a quarter turn at a time. Most concealed hinges use a screw on the door side and a screw on the cabinet side; turn one, close the door, and check. Small increments are the key – a full turn usually overshoots.
- Check that the mounting plate is tight. A hinge plate that’s worked loose from the cabinet side will make the door sag no matter how you adjust the hinge. Tighten the plate screws first, then adjust.
- Look for signs of a box problem. If the cabinet side itself is bowed, if a shelf is no longer level, or if the door won’t stay closed after adjustment, the issue is the box, not the hinge. That’s when you call your contractor – and in most cases, it’s covered.
One note specific to Frisco: cabinet doors on the sunny side of the house drift more in the summer, when humidity makes the wood swell. If a door that was fine in March binds in July, wait for the dry months before adjusting, or you’ll overcorrect and have a gap in winter.
What Your Contractor’s Guarantee Covers (and What It Doesn’t)
The line between homeowner maintenance and contractor responsibility is where most disputes start. Here’s the plain-English version. Your contractor’s guarantee – at Penhallow Remodeling, our 365-Day Done Right Promise – covers defects in the work and materials: a cabinet door that de-laminates, a hinge that fails, a tile that pops, a faucet that leaks at a factory joint. It doesn’t cover wear, misuse, or the maintenance tasks in this guide. If the caulk at your sink opens because it hasn’t been checked in a year, that’s maintenance. If the caulk we installed in month one fails in month four, that’s ours.
The Kingswell Way, the standard we operate under, puts the guarantee in writing before work starts: a written price, a defined arrival window, a clean job site, and a written guarantee on every project. So you can look at exactly what’s covered. Our Kansas-standard 365-Day Done Right Promise means if a covered defect shows up inside the year, we come back and fix it at no charge – and if a repair fails, the return visit is free.
Quick Reference: Who Handles What
- Contractor: failed hinges, tiles that pop, doors that de-laminate, fixture defects, leaks at factory joints, grout cracking at installation joints
- Homeowner: caulking refresh, hinge alignment adjustments, hardware tightening, water filter changes, resealing stone counters and grout, cleaning products
- Call a licensed pro: any gas odor, supply line failure, water damage behind cabinets, subfloor softness, electrical issues
When you’re ready to plan the next phase of the home, our general contractor in Frisco team can help scope a whole-home remodel with the same written-price structure. And if the kitchen is still in the planning stage, our kitchen remodeling in Frisco page walks through layout options and cabinet lines. For the big-picture version of how we approach every project, start at our Penhallow Remodeling Frisco home.
Year Two and Beyond: The Annual Routine
After the first year, the schedule simplifies to an annual routine that takes about ninety minutes. Do it once a year, ideally in the fall before the dry season, and most kitchens will keep looking new for a decade or more.
- Spring: Full hardware check and hinge adjustment; inspect under-sink connections; check appliance seals and filters
- Fall: Caulk refresh at sink rim and backsplash; reseal stone counters and grout; check grout lines for cracks; inspect gas connections visually
- Every 18 – 24 months: Replace the refrigerator water filter, clean the range hood filter, and check the dishwasher’s drain hose
- Every 3 – 5 years: Re-caulk the sink rim and any joint that sees heavy water exposure plus a full inspection of the cabinets and drawer slides
Natural stone, like Cambria partners use in their quartz, doesn’t need resealing, but granite does. Grout needs resealing regardless of what’s above it. And the caulk seam is the single point that fails most often no matter what material you chose.
Common Mistakes to Avoid
- Assuming “maintenance-free” means “never touch it.” Quartz is nearly maintenance-free. The caulk seam at the backsplash, the sink rim, and the counter-to-wall joint are not. They fail annually if ignored.
- Skipping the month-one hardware pass. Loose pulls left alone will wallow out the mounting holes on new cabinet faces, and that’s a bigger fix than a quarter turn in month one.
- Never checking appliance connections. Slow leaks at the dishwasher supply line and refrigerator water line are the most common causes of subfloor damage in remodeled kitchens – and they’re invisible until the floor cups.
- Using abrasive cleaners on painted cabinets or stone counters. Vinegar and citrus etch granite and quartz over time. A pH-neutral cleaner is the safe choice.
- Ignoring hinge drift because “it’s just a door.” A door that won’t stay closed after adjustment is telling you something about the cabinet box, not the hinge. Calling early gets it handled under guarantee.
- Over-tightening hardware. A pull that’s torqued too hard cracks the finish. Snug is enough.
- Treating a hairline grout crack at an inside corner as a defect. Cracks at changes of plane are normal, and they get caulk, not a warranty claim.
See the difference
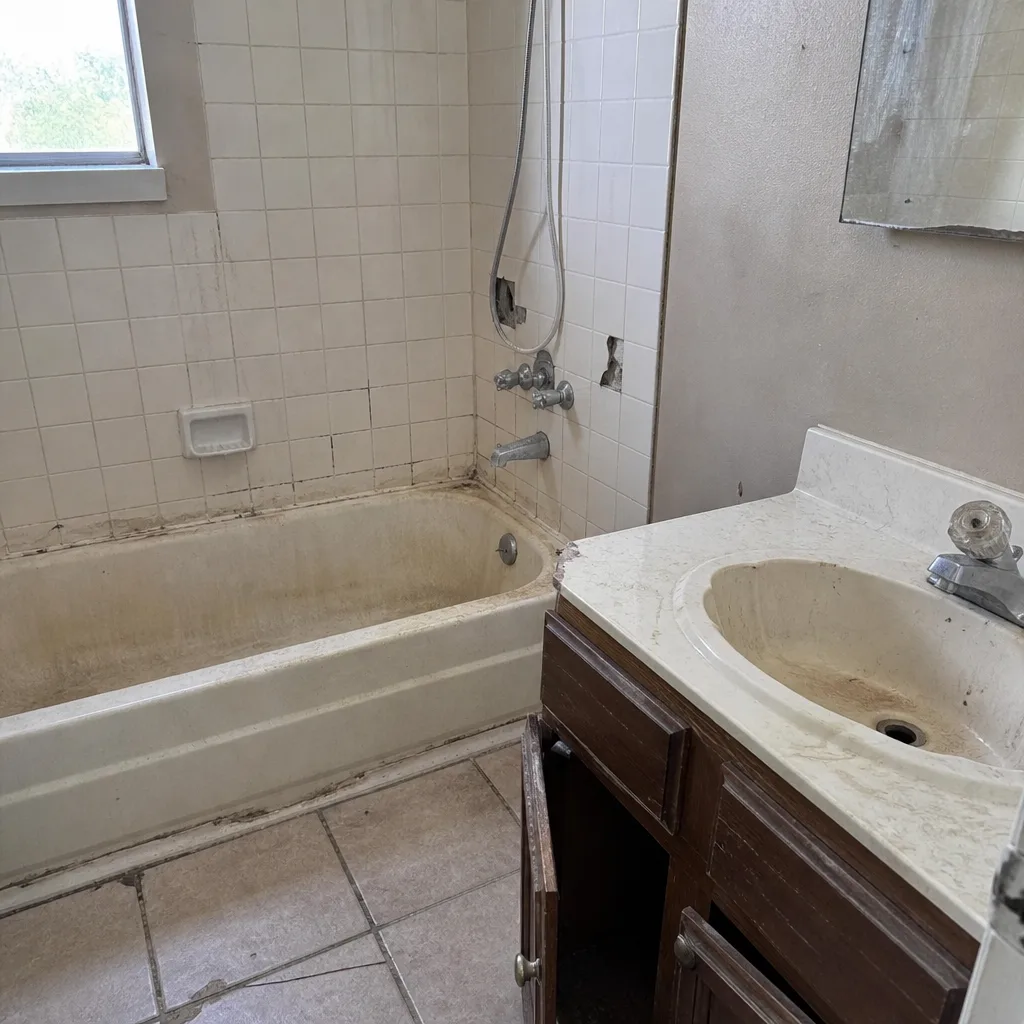 Before
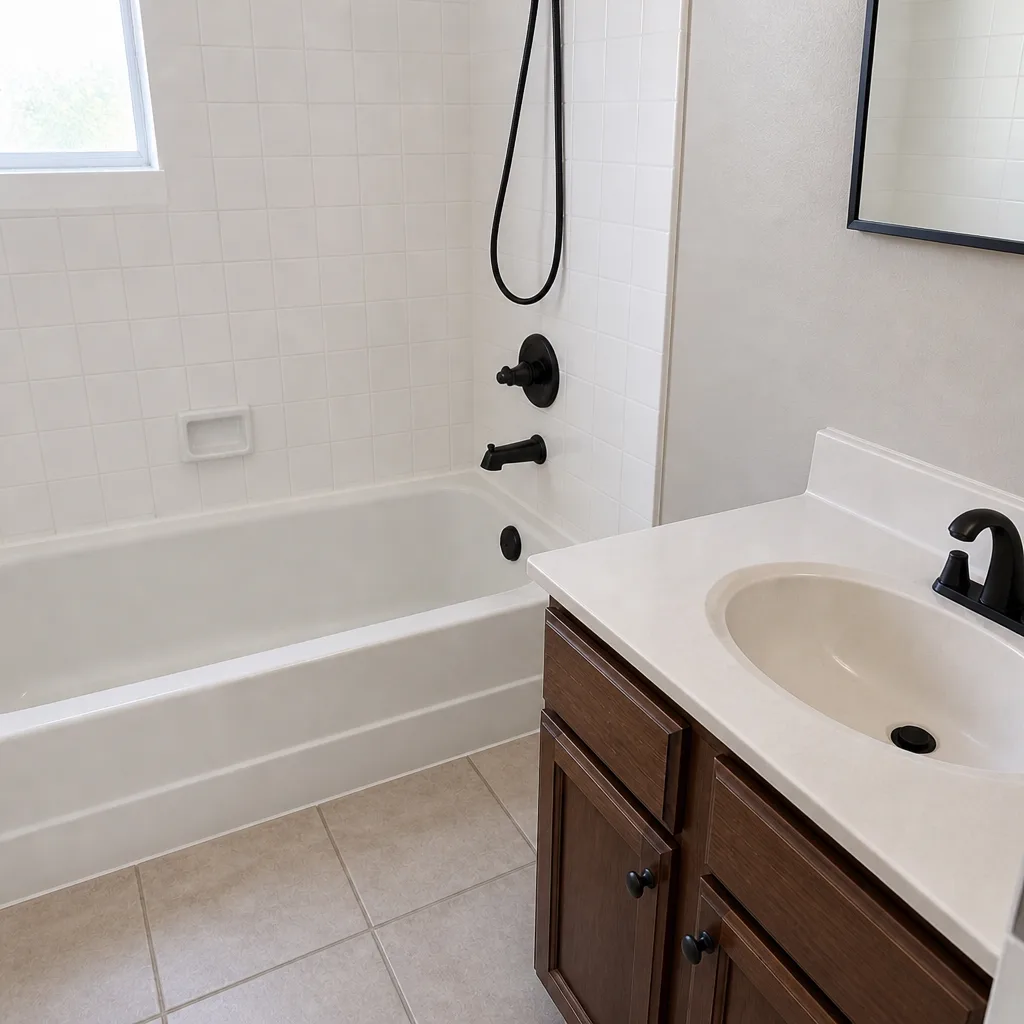 After
 Before
 After
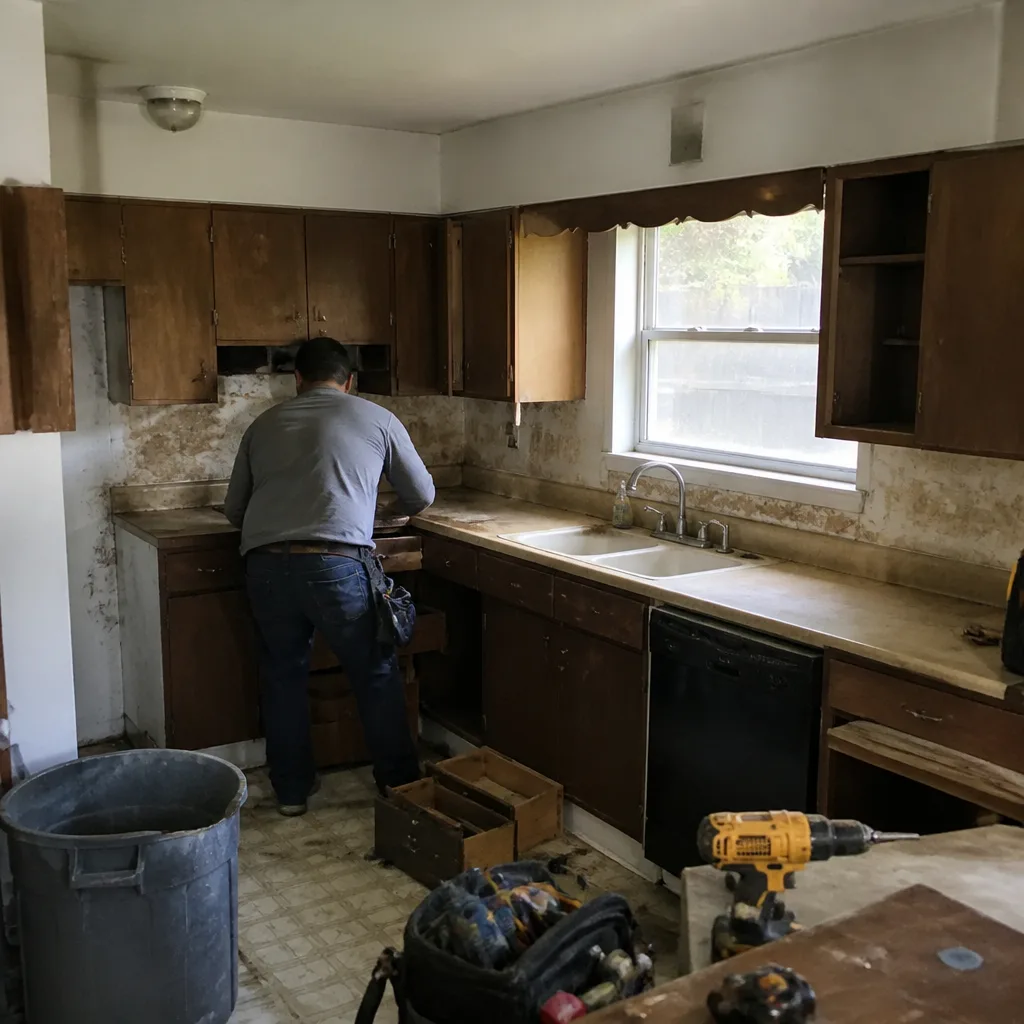 Before
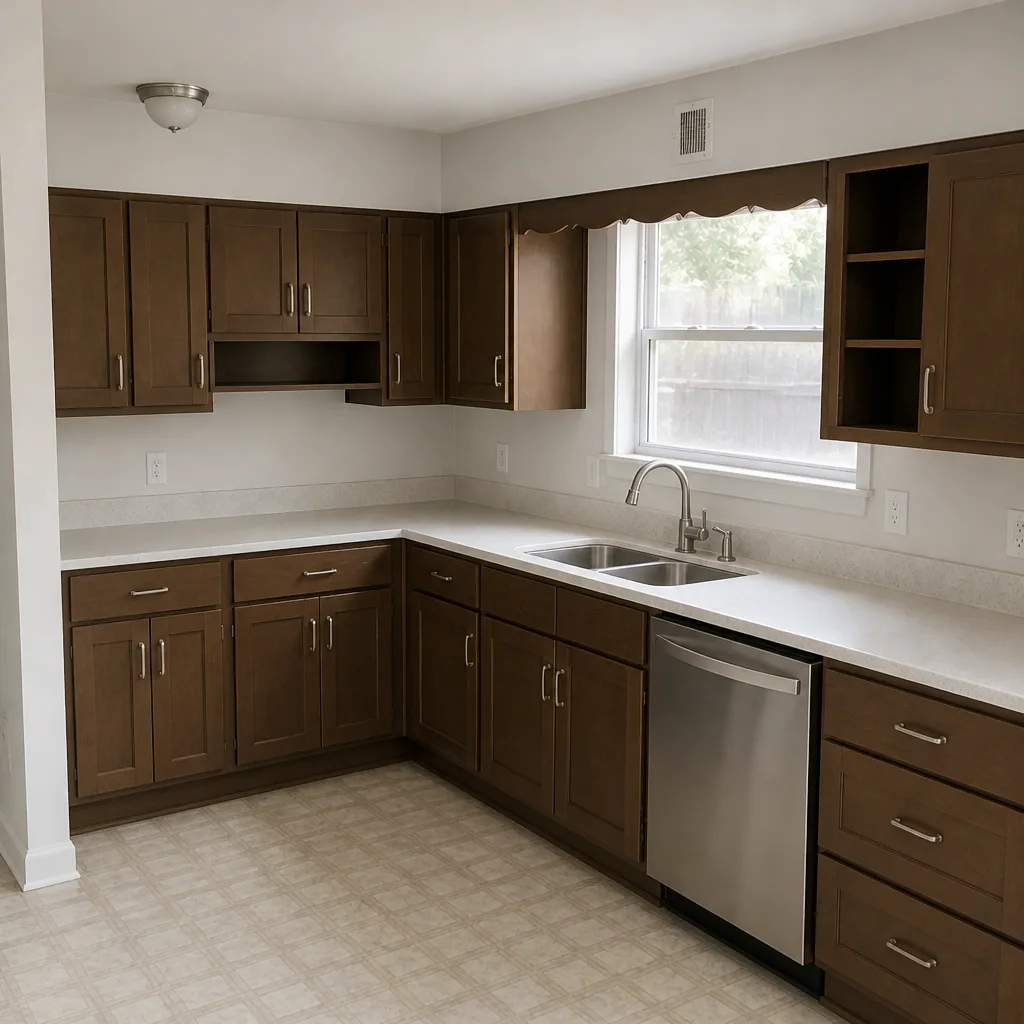 After
When to Call a Professional
Some things on this list are homeowner work: caulk refresh, hinge adjustment, hardware tightening, water filter changes. Some things aren’t. Call us – or any licensed professional – if you smell gas anywhere near the range or the supply line, if you find water damage or softness in the subfloor or cabinet base, if a cabinet box is visibly bowed or a shelf won’t stay level, if you see rust at a gas fitting, or if a covered defect shows up inside your guarantee period and you want it handled right. Gas lines, supply failures, and structural cabinet issues aren’t DIY territory, and a quick call today prevents a much bigger repair. Penhallow Remodeling Frisco offers free estimates in Frisco – call (833) 954-5757 and a real person will pick up.
Frequently Asked Questions

Start at the one-month mark. That first visit catches the settling issues – hardware that has worked loose, hinges that have drifted, caulk that has pulled away – while they’re still small. Then follow the schedule at months three, six, nine, and twelve, and once a year after that.
The quartz itself doesn’t need sealing or special cleaners, but the caulk joints around it do. The seam where the counter meets the backsplash and the sink rim needs inspection twice in the first year and a caulk refresh if it pulls away. Water that gets behind an open seam is the most common cause of tile and cabinet damage in a remodeled kitchen.
European-style concealed hinges drift over the first year, mostly because wood cabinets expand and contract with Frisco’s humidity swings. A three-minute adjustment with a screwdriver usually fixes it. If the door won’t stay closed after adjustment, or a shelf is no longer level, that’s a cabinet box issue and worth a call to your contractor.
At month three, month nine, and then once a year after that. Those two connections are the leading cause of slow leaks that damage subfloor and cabinet bases, and they’re completely invisible until the floor starts to cup. A dry tissue run along each fitting takes two minutes.
Covered defects are what the guarantee is for: failed hinges, tiles that pop, fixture leaks at factory joints, cabinet doors that de-laminate. The maintenance tasks in this guide – caulk refresh, hinge adjustment, hardware tightening, resealing – are homeowner care. At Penhallow Remodeling, our 365-Day Done Right Promise is in writing on every project, so there’s no ambiguity about what’s covered.
Granite and grout yes; quartz no. Stone counters and tile grout should be resealed annually, ideally in the fall before the dry season. Quartz, like the Cambria, Silestone, and Caesarstone lines we install, doesn’t need sealing, but the caulk joints around the counter still need the same inspection as any other material.
Written by the team at Penhallow Remodeling Frisco.
The Bottom Line
A remodeled kitchen depreciates faster than it should because the maintenance tasks that protect the expensive parts – caulk, hardware, and appliance connections – are either unknown or inconsistently done. The fix is simple: a month-one settling check, a caulk and connection pass at months three, six, and nine, a full reset at twelve, and a ninety-minute annual routine after that. Frisco’s humidity swings make the schedule matter more here, not less. If you’re planning a kitchen remodel or a bathroom update and want a written price and a written guarantee before work starts, call (833) 954-5757 for a free estimate.