Last updated November 18, 2026








Free written scope consultation - allowances, timeline, and change-order rules on paper before a single trade is scheduled
Bathroom Remodeling Troubleshooting: Common Problems and How to Fix Them
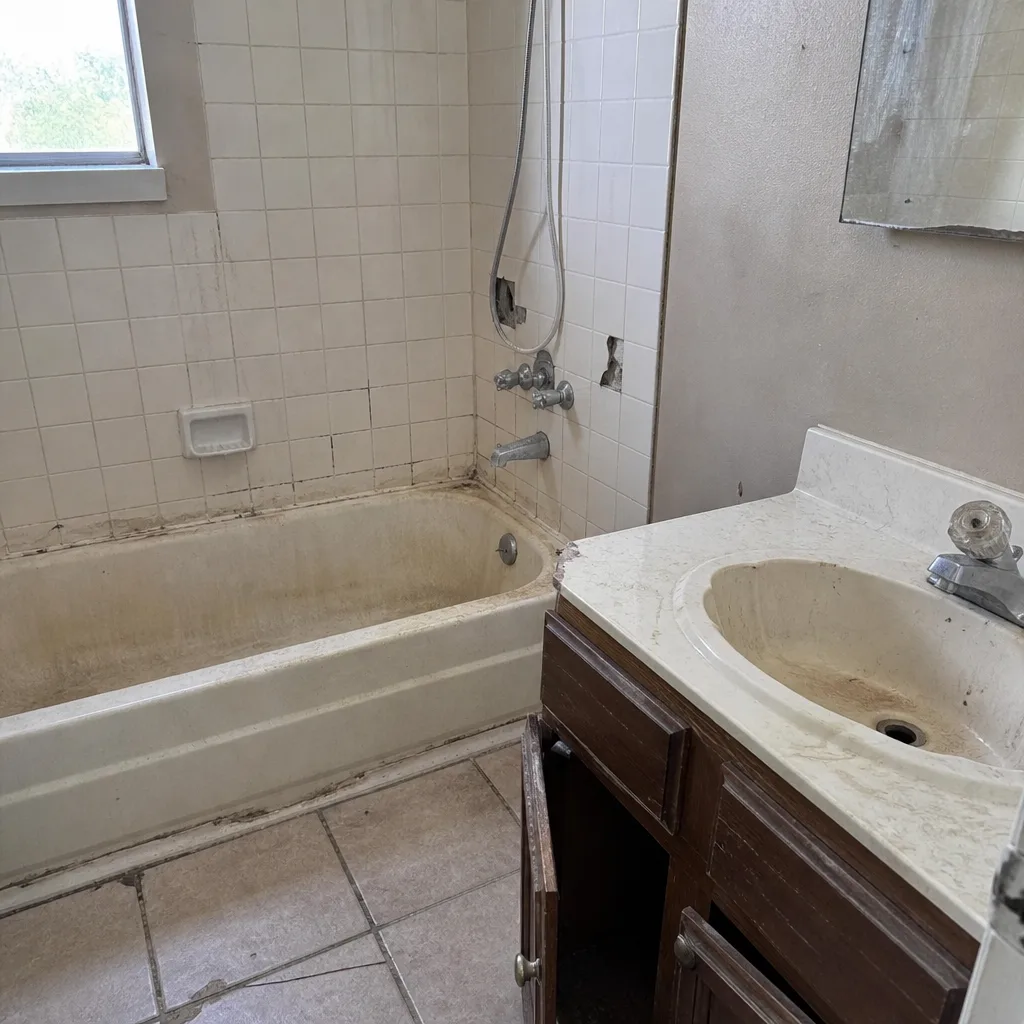
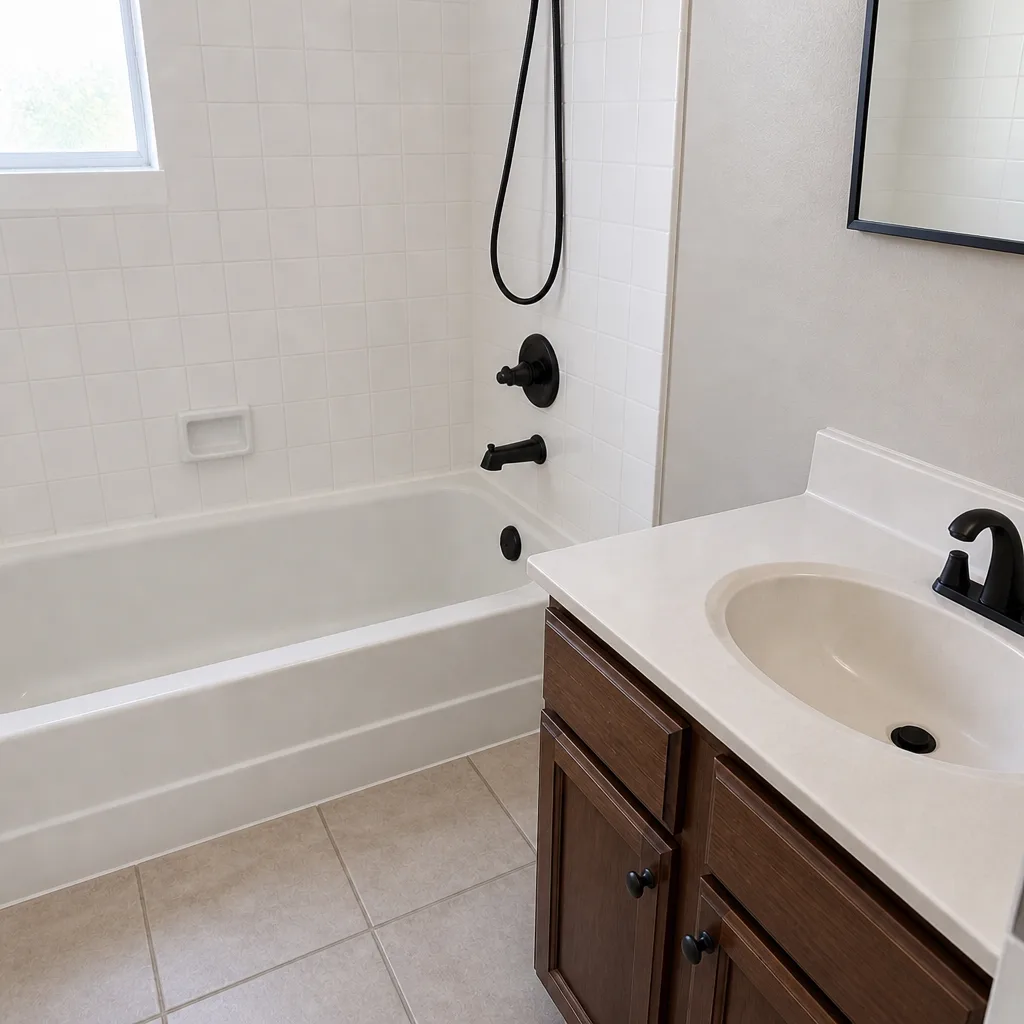
A single soft spot in a tiled shower floor isn’t a tile problem. It’s a waterproofing failure that may have been soaking the subfloor for months before the tile moved enough for anyone to notice, and replacing just the tile will produce the same failure in about 18 months. That’s the pattern we see most often across Frisco: homeowners call about a cosmetic symptom, and the actual cause sits two layers deeper than where the damage shows. This guide teaches you to diagnose before you call anyone, so you know which layer is failing, what the fix really involves, and whether the problem is yours to handle or a contractor’s responsibility under guarantee.
Quick Answer
Most bathroom remodel problems trace back to one of three hidden layers: the substrate (the flat backing wall and floor behind your tile), the waterproofing membrane (the barrier that keeps moisture out of the structure), or the rough plumbing (the pipes and drain assembly inside the wall). Surface issues like cracked caulk or discolored grout are cosmetic and fixable on a Saturday. Anything that flexes underfoot, smells damp, or shows water where it shouldn’t points to a substrate or waterproofing failure, which means at least a partial tear-out. Diagnosing the right layer first saves you from paying for a repair that fails again.
Styles & brands we work with
- Kitchen remodeling
- Bathroom remodeling
- Home additions & ADU
- Roofing
- Windows & doors
- Driveway & pavers
- Fence
Table of Contents
- The Three Hidden Layers Behind Every Bathroom Failure
- Surface Failure vs. Substrate Failure: A Two-Minute Field Test
- Why Your Exhaust Fan Predicts Every Future Problem
- Ghosting Grout Lines: Cosmetic or a Sign of Poor Mortar Coverage?
- Workmanship Guarantee vs. Manufacturer Warranty vs. Homeowner Maintenance
- How to Document a Problem and Protect Your Guarantee Rights in Texas
- Post-Remodel Problems That Are Actually Normal
The Three Hidden Layers Behind Every Bathroom Failure
When a bathroom goes bad, the visible layer is rarely the guilty one. In our experience remodeling bathrooms across Frisco and the surrounding suburbs, we can trace nearly every recurring failure to one of three layers hiding behind the finished surface.
The substrate. This is the backing material behind your tile: cement board, a mortar bed, or (in older homes) greenboard drywall. Substrate is what gives tile a rigid, flat base. When it gets wet and stays wet, it swells, crumbles, or softens, and every tile above it starts to move. A failing substrate almost always requires removing tile to fix, because you can’t stabilize what you can’t reach.
The waterproofing membrane. Under the substrate or applied over it, a waterproof layer stops moisture from reaching the wood framing. In a shower, this is typically a liquid-applied coating, a sheet membrane, or a bonded waterproof panel system. If the membrane is installed incorrectly at the corners, the curb, or the drain flange, water gets behind the tile and never leaves. That’s the classic soft-spot scenario.
The rough plumbing. The pipes, valves, and drain rough-in inside the wall. A slow leak at a valve body or a poorly seated drain can drip for years before a ceiling stain shows up downstairs. Plumbing failures are the only layer that can cause structural rot without any visible surface symptom at all.
Knowing which of these three is involved tells you whether the fix is cosmetic ($150-$500), a partial tear-out ($1,500-$4,500), or a full rebuild ($8,000 and up in the Frisco market). If you’re planning a full rebuild rather than a repair, our bathroom remodeling in Frisco page walks through the process from demo to final inspection.
Surface Failure vs. Substrate Failure: A Two-Minute Field Test
You don’t need special tools to tell a cosmetic problem from a structural one. A flashlight and a plastic probe (a stiff zip tie or a small screwdriver works) will get you most of the way to a diagnosis. Here’s the sequence we run, and you can run it too:
- Shine the flashlight along the shower floor and wall joints. Look for a dark line where tile meets tile near the drain or curb. Darker grout in a defined band usually means moisture is sitting behind the surface.
- Press a finger firmly on every tile within a foot of the shower drain. If any tile moves, sounds hollow when tapped with a coin, or feels spongy underfoot, the substrate or mortar bed has failed. Stop here; this is a substrate problem.
- Probe the caulk line at the base of the shower walls. A plastic zip tie slips in roughly 1/8 inch before it hits solid backing. If it goes deeper, or comes out wet, the waterproofing membrane is compromised.
- Look at the baseboard on the opposite side of any shared wall. Soft baseboards, a musty smell, or bubbled paint on the drywall across from the shower signals moisture traveling behind the wall, which points to plumbing.
- Check the ceiling below. A stain, a sag, or a drip point on the room below means a rough plumbing leak, not a surface issue. Call a professional before doing anything else.
If the test lands on surface failure, the fix is grout removal and re-caulking with a kitchen-and-bath silicone at every change of plane. Fifty to two hundred dollars in materials and a half day. If it lands on substrate or waterproofing, plan for a partial or full tear-out. Our general contractor in Frisco team can confirm the diagnosis in a single site visit and quote the repair in writing.
Why Your Exhaust Fan Predicts Every Future Problem
In a North Texas climate, your exhaust fan is the single best predictor of whether your bathroom tile and grout will survive the next decade. That’s not a marketing line. Frisco summers run humid enough that a shower produces visible steam for fifteen-plus minutes after the water stops, and winters drop hard enough that the same shower produces condensation across every cold surface. Bathrooms that vent poorly in this climate rot from the inside, and the first sign you’ll see is grout that never quite dries.
Here’s how to check your fan in under a minute:
- The tissue test. Hold a single square of toilet paper against the grille while the fan runs. If it doesn’t stick to the grille and stay stuck for at least three seconds, the fan isn’t moving enough air.
- The mirror check. Run the shower for ten minutes. If the mirror is still fogged five minutes after you turn the fan on low, you’re pumping less than the 100-110 CFM a standard bathroom needs.
- The run-on check. A fan should run at least 20 minutes after the shower ends. If you’re in the habit of turning it off when the water does, you’re leaving moisture in the walls.
- The vent check. Step outside and confirm the vent actually exits the roof or wall. Fans that dump into the attic are worse than no fan at all; the moisture has nowhere to go but back into the house.
Upgrading to a 150 CFM fan with a motion-sensor timer runs $300-$600 installed in the Frisco market, and it’s the single cheapest way to prevent the inevitable mold, ghosted grout, and soft substrate that show up two or three summers after a remodel. If a recent upgrade is in your plans, a Penhallow Remodeling Frisco home visit will tell you what your current setup is missing.
Ghosting Grout Lines: Cosmetic or a Sign of Poor Mortar Coverage?
Ghosting is the faint, uneven outline that appears beneath a tile surface when grout or adhesive hasn’t fully covered the back of the tile. It looks like a shadow moving through the grout lines. Sometimes it’s cosmetic; sometimes it’s the first indication that tiles weren’t properly embedded, which is a workmanship failure that shows up under foot traffic and drying cycles.
How to tell the difference:
Cosmetic ghosting shows up as a slight variation in grout color, usually faded within a week, and doesn’t return after a good scrubbing with an oxygen-based cleaner. It’s caused by inconsistent grout pigment, a too-wet sponge during cleanup, or efflorescence in the first few months. It’s harmless.
Workmanship ghosting shows up as a defined outline of a specific tile, recurs after cleaning, and is usually accompanied by a hollow sound when you tap the tile. Under the tile, that means the installer missed coverage across a significant portion of the back, which leaves the tile unsupported and the grout line without a solid base. Over months, that tile will crack or pop loose. In our experience across Frisco remodels, workmanship ghosting almost always appears in the same band of tiles: the ones installed near the end of a long day.
If you suspect workmanship ghosting, tap each tile with a coin. A solid, high tick is fine. A dull thud means poor adhesion, and that’s covered by a workmanship guarantee, not maintenance. Document it with photos and a written note the same day you notice it. Our kitchen remodeling in Frisco team uses the same coin-tap diagnostic on backsplashes and countertop installations, so a single call can cover both rooms if you’re seeing the pattern in more than one place.
Workmanship Guarantee vs. Manufacturer Warranty vs. Homeowner Maintenance
Three different kinds of responsibility apply to any post-remodel problem, and knowing which one you’re dealing with determines who pays for the fix. Misunderstanding this is the single most common reason homeowners get stuck with a bill they shouldn’t owe.
Workmanship guarantee covers anything the installer did wrong. Improper mortar coverage, incorrectly bonded waterproofing, out-of-level tile, wrong fasteners, wrong adhesive for the tile type, insufficient substrate preparation. This is the contractor’s responsibility, and a good guarantee covers it for at least a year, often longer. Our 365-Day Done Right Promise means that if the work fails inside the first year, we return and fix it at no charge, covered in writing on every project. The free second visit if a repair fails during that period is included; there’s no service call fee and no re-inspection charge.
Manufacturer warranty covers the product itself: tile, fixtures, cabinetry, countertops. A Kohler valve that fails internally, a Moen cartridge that sticks, or a crack that appears in a Cambria quartz top all fall under the manufacturer’s warranty, not the contractor’s. Most of these run from one year to lifetime, and the contractor’s role is to install correctly and file the paperwork. When we install Cambria quartz or Moen fixtures, we register the warranty at completion so the coverage transfers cleanly to the homeowner.
Homeowner maintenance covers everything that wears out from regular use: caulk replacement at every change of plane (every two to three years), grout resealing in shower areas (annually), fan filter cleaning, and drain-screen upkeep. These are not covered by any guarantee. Skipping them is the fastest way to turn a small maintenance item into a substrate failure you’ll pay for.
How to Document a Problem and Protect Your Guarantee Rights in Texas
Texas contract law puts the burden on the homeowner to show timely, written notice of a defect. If you call about a problem eighteen months later with no photos and no written record, you’ve weakened your claim under any guarantee, including a strong one. The good news: five minutes of documentation at the moment you spot the issue is enough to protect your rights.
Here’s the sequence we recommend to every homeowner we work with:
- Photograph the problem with a scale reference. A tape measure held alongside the damage, a coin, or a coin placed next to a crack tells the story later that a close-up can’t.
- Photograph wide and close. Get one shot of the whole wall or floor and one detail shot of the specific defect. Date-stamp the camera (most phones do this by default).
- Write a dated notice. Email or text the contractor the same day, describing what you see in plain words: “On [date], a soft spot approximately 4 inches across appeared in the shower floor near the drain. Photos attached.” No legal language required. Clear facts and dates are what matter.
- Save the contractor’s written reply. Every response is part of the record. A written acknowledgement that the issue exists is worth more than any phone call.
- Don’t repair it yourself before the contractor inspects. Homeowner repairs made before inspection can void the guarantee, because they remove the evidence the contractor needs to make a fair assessment.
If you’re still inside your guarantee window and the problem is clearly workmanship, a single email gets the process started. If the contractor doesn’t respond within a week, follow up in writing again, and keep the correspondence. A live person answers our phone 24/7, so if a problem is urgent, calling is the fastest path; documentation can follow.
Post-Remodel Problems That Are Actually Normal
Not every issue in the first few months after a remodel is a defect. A handful of things are expected, and knowing them saves you a needless service call.
- Hairline grout cracks in the first 60 days. New grout shrinks as it cures, and small cracks at inside corners are normal. Caulk over them with a kitchen-and-bath silicone once fully cured.
- A faint musty smell in week one. Fresh adhesive, grout, and paint off-gas for several days. If the smell persists past two weeks, check the fan first (see above).
- Stone countertops and tile feeling cool or slightly uneven underfoot. Natural stone and ceramic tile transfer temperature differently than the previous floor; some unevenness at grout lines is inherent to the material.
- Cabinet doors that don’t line up exactly. Doors and drawers settle in with use, especially in a Frisco summer; most alignment tweaks happen at the 30-day mark or later, and a good contractor schedules that adjustment as part of the project.
- A slight color shift in the grout after the first wet-down. Sealed grout darkens slightly on first contact with water. If the color looks permanently blotchy after two weeks, that’s a problem worth a call.
If you’re considering a full remodel and want the process demystified, our bathroom remodeling in Frisco guide covers what to expect from the initial estimate through final inspection.
Common Mistakes to Avoid
- Replacing tile over failed waterproofing. This is the single most expensive mistake we see in Frisco bathrooms. If the substrate is soft, new tile will fail within 18 months because the underlying problem was never addressed. The cost of the tear-out is unavoidable; doing it twice is not.
- Skipping the exhaust fan upgrade to save $400. The $400 you save on a proper fan installation becomes a $4,000 substrate and mold repair within three Frisco summers. This trade is never worth making.
- Ignoring a ghosted grout line that comes back after cleaning. Ghosting that returns is usually a workmanship issue, and the guarantee window is ticking. Document it the day you see it, not six months later.
- Using caulk where grout belongs, or grout where caulk belongs. Grout belongs in flat fields between tiles; caulk belongs at every change of plane (corners, curb, wall-to-floor joints). Getting this backwards causes cracking from normal movement.
- Sealing the shower enclosure before the first wet-down. Grout needs to fully cure (usually seven to ten days) before sealing. Sealing too early traps moisture in the grout, which is worse than not sealing at all.
- Filing a complaint by phone only. Texas guarantee claims hinge on written notice. A call is helpful; a written, dated email with photos is what actually preserves your rights.
- Cleaning with bleach on stone surfaces. Bleach and acidic cleaners etch natural stone and degrade quartz binders. Use a pH-neutral cleaner, especially on Cambria, Silestone, and Caesarstone surfaces.
See the difference
 Before
 After
 Before
 After
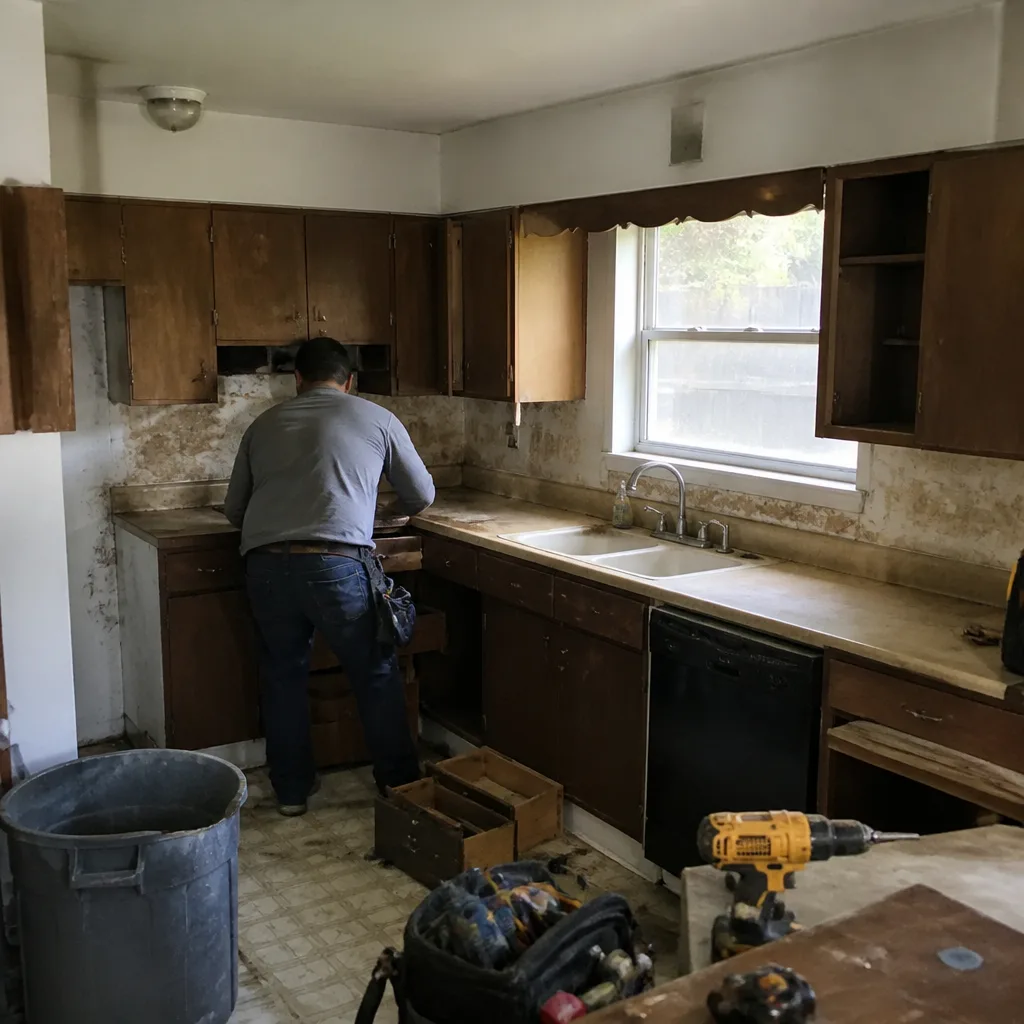 Before
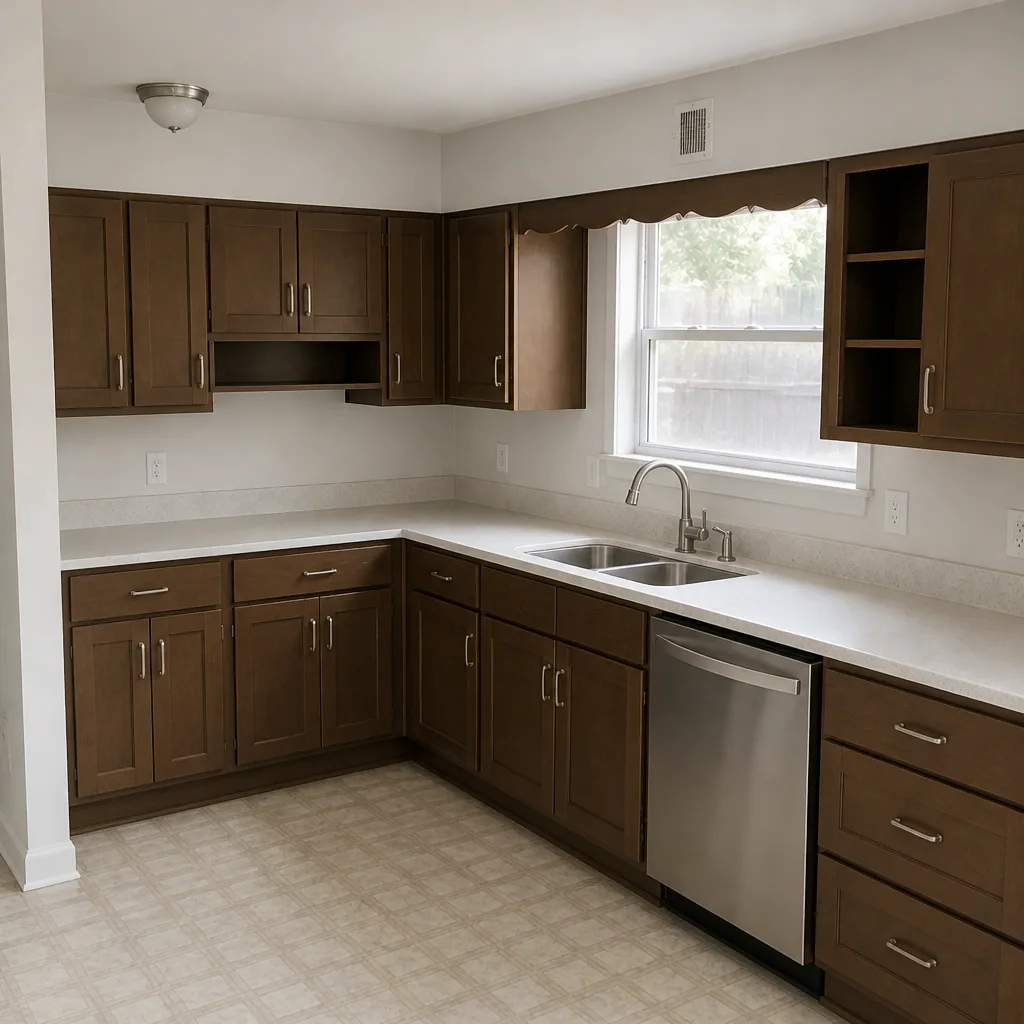 After
When to Call a Professional
Call a professional when the problem involves any of the three hidden layers, not just the cosmetic surface. Specifically: any tile that moves or sounds hollow underfoot or under a coin tap, any stain on the ceiling below the bathroom, any persistent musty smell that doesn’t clear after two weeks of running the fan properly, any soft baseboard on the shared-wall side of the room, or any grout line that ghosts back after cleaning. These are not Saturday projects. They need diagnosis under the tile, and the space between early fixing and late fixing is usually several thousand dollars in the Frisco market.
Penhallow Remodeling Frisco offers free estimates in Frisco and can diagnose the layer behind the surface in a single visit, with a written price before any work begins. Call (833) 954-5757 and a live person will pick up, day or night.
Frequently Asked Questions
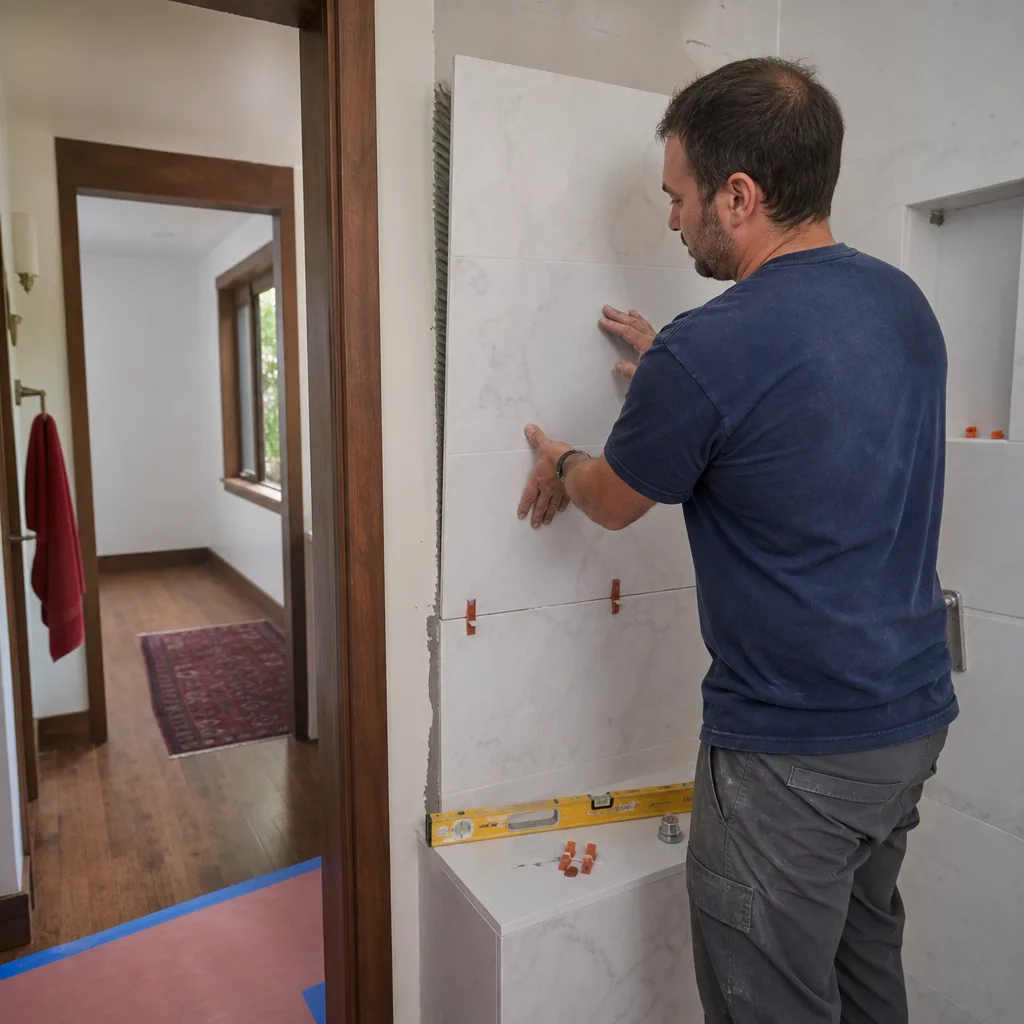
Almost always because a hidden layer wasn’t done correctly, not because the visible materials failed. The three culprits are inadequate mortar coverage behind tile (leading to hollow sounds and cracking), improperly bonded waterproofing at corners and the shower curb (leading to soft spots), and a rough plumbing leak at a valve body or drain flange. A coin tap and flashlight can tell you which. If the failure happened within a year of the work, call the contractor in writing and document it with dated photos.
Press a finger on tiles near the drain and along the curb. If any moves, sounds hollow, or feels spongy, the substrate or waterproofing is compromised, not just the tile. A plastic zip tie probing the caulk at wall joints that slips deeper than 1/8 inch or comes out wet is another strong signal. Tile-only problems don’t flex under pressure; waterproofing failures do.
Don’t just clean it; find the moisture source. Mold that returns after a vinegar or mold-specific cleaner is being fed by a wet substrate or a plumbing leak, and cleaning won’t fix it. Call a contractor who can diagnose the layer behind the tile. In our Frisco work, mold that appears within a year of a remodel is far more often a fan or waterproofing issue than an unrelated environmental one.
It depends on the cause. Cracked grout from normal curing within 60 days is homeowner maintenance, and a quick caulk repair fixes it. Cracked grout that returns in the same line, accompanied by hollow-sounding tile, is a workmanship failure and typically covered by a written guarantee for at least a year. Manufacturer warranties cover the product itself; they don’t cover installation errors.
Partial tear-out and re-waterproofing a shower floor runs $1,500-$4,500 in the Frisco market, depending on tile type and how much of the wall needs to come out. A full shower rebuild runs $8,000-$18,000. If the failure happened inside a guarantee window and is clearly workmanship, your cost is zero for the repair, aside from any trim or finish upgrades you choose to add. Call (833) 954-5757 for a written estimate before any work starts.
Slightly, for the first 15-20 minutes, yes. Still humid after 30 minutes with the fan running means the fan isn’t moving enough air or isn’t venting outside. A standard Frisco bathroom needs 100-110 CFM; upgrade to 150 CFM with a timer if your mirror is still fogged after a ten-minute shower. This single fix prevents the majority of future grout, mold, and substrate problems.
The Bottom Line
Bathroom remodel problems almost always trace to the substrate, the waterproofing membrane, or the rough plumbing, not the finish surface you first notice. Diagnose the layer first with a flashlight, a coin, and a plastic probe; that one step tells you whether the fix is a weekend caulk job or a partial tear-out. Keep the exhaust fan running enough to keep up with a North Texas summer. Document every problem with dated photos and a written email the same day you spot it, and know which layer of warranty covers the failure. The fix that lasts is the one that addresses the layer behind the surface, not the symptom on top of it.
Written by the team at Penhallow Remodeling Frisco.
Schedule your free estimate
If you’re seeing soft spots, ghosted grout lines, or recurring moisture issues and you’re not sure which layer is failing, call (833) 954-5757 to schedule a free estimate in Frisco. A live person answers 24/7, every technician is background-checked and arrives in uniform, and you’ll get a written price before any work starts, backed by our 365-Day Done Right Promise.